
Display LCD 4x20 I2C new
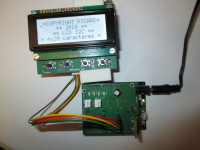
This display has already been proposed in December 2015, but this new version has been modified, improved and completed.
DESCRIPTION OF THE OPERATION OF THE I2C DISPLAY.
A display, represents an essential element for a lot of achievement. It is often greedy in port I/O and
demand a place in memory, which strike the capital often limited some microcontrollers.
The I2C 4 x 20 characters display module which features will be described here allows several uses.
_A obvious place in a timeline use permanent.
_ A one-time use to check the operation of installation in development (debug, or other). The
imperative being to have a suitable I2C connector.
_A module device to create a montage of prototype on table with a view to its integration in the final
installation.
This display has already been proposed in December 2015, but this new version has been modified,
improved and completed.
Four push buttons move the cursor in two dimensions regardless of the software controls.
DESCRIPTION OF THE DISPLAY CONTROLS:
Backspace : BS ($08)
Backspace the cursor to a position to the left.
Horizontal tabulation : HT ($09)
Ahead of the cursor one position to the right.
Direct command : ($11)
Command to manipulate the display according to the characteristics of the manufacturer
instructions. The command expects parameter byte of the array of the features of the display.
Clear line : ($13)
Deleting a line complete by giving its number from 1 to 4.
Move cursor : ($12)
Positioning of the cursor with as parameters the number of the column from 1 to 20 and the number
of the line from 1 to 4.
Clear zone : ($14)
Deleting a display area from the cursor to a specified number of characters.
Write string :($02)
Of course, display a string. (This is the minimum for a display).
Read char : ($05)
Retrieve the cursor to a certain number of characters.
Line feed : LF ($0A)
Descend of the cursor to a position with passage to the first line when the fourth is reached.
Up cursor : ($0E)
Up the cursor to a position with the fourth line crossing when the first is reached.
Return : ($0D)
Return the cursor to the beginning of the line.
Where is cursor : ($07)
Recovery of the address of the cursor in the form of double-byte decimal representatives followed
the number of the column, the line number.
Del : ($18)
Deleting the last character.
Command backlight : ($0F)
Power on/off lighting rear display.
EXAMPLE OF MANIPULATION FOR THE ARDUINO IDE:
The following function positions the cursor.
byte LCD = 0x28;
void lcd_mov_cursor (byte column, byte line)
{
Wire.beginTransmission(LCD);
Wire.write(0x12);
Wire.write(column);
Wire.write(line);
Wire.write(0x00);
Wire.endTransmission(); // stop transmitting
}
The following function returns the column and row numbers in columncur and linecur.
void where_is_cursor (void)
{
Wire.beginTransmission(LCD);
Wire.write(0x07);
Wire.write(0x00);
Wire.endTransmission(false);
Wire.requestFrom(LCD, 3); // request 3 bytes from slave device
dummy = Wire.read();
columncur = Wire.read();
linecur = Wire.read();
Wire.endTransmission(); // stop transmitting
delay(1);
The following code writes a character string at the cursor.
{
Wire.beginTransmission(LCD); // transmit to device LCD
Wire.write(0x02); // opcode string display
Wire.write("ABCDEFGHIJKLMNOP");
Wire.write(0x00);
Wire.endTransmission(); // stop transmitting
delay(1);
}
On/Off backlight.
void backlight (void)
{
Wire.beginTransmission(LCD);
Wire.write(0x0f);
Wire.write(0x00);
Wire.endTransmission(); // stop transmitting
}
Discussion (0 commentaire(s))