
BOB BL600 : Bluetooth Low Energy 4.0 [ 140270 ]
I love Bluetooth.
I love Bluetooth. I sought a model more accessible than BLE112 Bluegiga Technologies.
Laird Technologies markets the BL600 :
- UART interface
- I2C interface
- SPI interface
- Many inputs / outputs
- The 10-bit analog inputs
- A Deep Sleep Mode to 0.4μA
- Language SmartBASIC ( we'll talk )
1 ) Purchase of Bluettoh Low Energy Development Kit and first test
I find the plate with its USB port that communicates with the serial module. I took the first example provided : a Bluetooth serial interface and I downloaded the Serial BL program on the Apple Store. The program module is charged with an error and after contact with the highly effective support Laird Technologies, I need to update the firmware. Unfortunately, this must be done by a specific interface that comes with the SDK . I'll find out after all the only commercially available modules have the right firmware. The program works fine but nothing special.
2 ) Modify the program unit BL600
A small project but has become incredibly easy . Turn on and off both leds SDK when sending digit 0 ( 0 LED off ), 1 ( 0 LED on) .... I took the program " cli.upass.vsp.slib " (error, I'll have to file sb . ) And after a few lines :
Sun CMP0$, CMP1$, tempo$
CMP0$ = " 0"
CMP1$ = "1"
tempo$ = LEFT (VRX$ , 1 )
/ / print tempo$
X = STRCMP (tempo$ , CMP1$ )
IF X == 0 then
gpiowrite (18,1 )
ENDIF
X = STRCMP (tempo$ , CMP0$)
IF X == 0 then
gpiowrite (18,0)
ENDIF
I use the iOS app and I LT Serial sending 1 , 0 .... But it will take forward as the on / off LED , nothing revolutionary, but within an hour was enough .
3) iOS program
A mail to the support and here I am with the source of LT Serial program and permission to use it. I study the specific program " ViewController.m ." So I program my first BL600 application with two buttons on / off switch to turn but two famous LEDs. The program works very well and should be documented as a reference ! !
4) Problem welding BL600
Like many new modules and integrated circuits , it becomes difficult for an amateur to weld . Laird Technologies has found a way to dream : 3 half cut the diameter of 1.6mm which allows the circuit to place the 10th of a millimeter. I will use an aluminum plate with screws sticking to the high temperature glue. We'll talk about this aluminum plate.
5 ) Creation of PCBs
Eagle in hand but not lbr file for the module. Patience and finally here is my LBR file created. There are two PCBs , one with all connections and a microphone with just the UART , I2C and SPI interfaces and 10 inputs / outputs. I told you three holes to place the circuit, I added 4 holes of 1.6 mm in each corner of the PCB to place the stencil ( a trick used for stencils ) The Eagle files are available on request.
6) The welding oven reflow
I sacrifice a PCB for 7 holes of 1.6mm in diameter and 7 screws I put in the sticky underside of the plate ( I wait one hour). I cut the stencil and 4 screws to put it (do not put the screws at the BL600 ) and I apply the solder paste . I remove the stencil and then put my PCB on my aluminum plate with seven screws. With having the resistors and capacitors , I place very easily BL600 . And I put in the oven : successful work .
7) The test with my famous leds
I realize with an epoxy plate holes with my two LEDs and a CR2032 battery . I program the BL600 module. After a simple command " AT + REN " I program is renamed " autorun $ $" and I put the jumper on the PCB Autorun which run my program from the power module. The tests are inconclusive. 8) An outdoor thermometer It's fine to turn on and off one , no, two LEDs but do a serious project . I choose a waterproof case and begins the PCB for a temperature sensor with NTC . The PCB made , and corrections start : too big ( I cut off ) , too complicated for the meter option my plants .... The program module SmartBASIC is very simple, just IF THEN PRINT ..... Event management is more complex but I capterai event connection to send the value of my temperature sensor. Since this is a " LOW ENERGY" module, the meter is put to the test : too much consumption. A tip of the support Laird Technologies and here I am with 0.4μA . A loop is then set up to wake the module every 5 minutes (for example) in the shortest time possible (not yet defined value). The temperature calculation is correct remains to be done iOS application alarm clock with temperature, for example
In summary :
The disadvantage of the need to reflow oven ( a BL600 module mounted markets might be , I can make a small amount to find out ) is largely forgotten by the realization of your program very easy on the BL600 module and its simple programming UART interface module . The source of the iOS program is easy to use for someone who has already developed on XCODE . It would be nice to make a documentation for the Android source, but I can speak less. In 2014, the BL600 may be a master module to communicate with other modules BL600 . It really is a beautiful product that I wanted to introduce you .
Jennifer
Thank to Google Translation and sorry for my teachers English :-)
Jannuary 2014 :
A lot of projects : Temperature, Voltmeter, IBeacon.....
Fevruary 2014 :
- PCB ready with different sizes
June 2014 :
BOB BL600 SLAVE
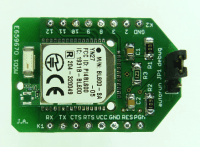
The PCB is made and tested. Elektor (Luc) has a copy. This arrangement has 4 inputs / outputs that can be divided in different configurations: 4 inputs / outputs, 2 analog inputs and 2 inputs / outputs or I2C port and 2 inputs / outputs.
The program is so simple to understand : smartBASIC. The implemantation the new firmware is not mandatory for a start and requires a specific controller.
MASTER BOB BL600
Manufacturer Laird Technologies announces its end of july. The goal is a dialogue between two series BOB BL600 one master and one slave from. This can then be implemented in the case-Wifi Bluetooth in a second time.
October 2014 :
READY READY READY READY READY READYJennifer
Available in the Elektor shop bl600-e-bob-140270-91
Want to build a project?
Bring your design to life with the Elektor PCB Service, powered by Eurocircuits. Upload the project files and order professionally manufactured PCBs or assembled boards through a proven European production platform.
Supporting KiCad, Eagle, Gerber, and ODB++ formats, the service is suitable for everything from prototypes and validation builds to series production and volume manufacturing.
Made in Europe. Fast. Reliable. Professional.
Discussion (1 commentaire(s))