
Build your own Colourful smart home accessory
See what you can make out of a Wemos D1 mini pro, a Adafruit NeoPixel 5050 RGB LED and a lamp from IKEA – and of course a lot of software.
1. Introduction.
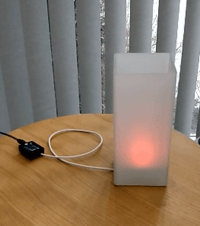
This is a small project that investigates what can be accomplished by a Wemos D1 mini pro, a Neopixel Jewel 7, and a (modified) lamp from IKEA.
Some may say that it is a Philips HUE or IKEA Tradfri clone, but this was not the intention when the project was started.
The project reviews the following toppics:
Each topic can be used in other projects alone or together. It is just a matter of imagination.
As shown later the schematic is exstreamly simple – all the hard work is done in software.
In order to assemble/modify the IKEA lamp, some mechanical skills are needed.
You also need to do some soldering, but it should be possible to handle.
2. Schematic.
The schematic is extremely simple as shown below in the attached image.
Make the following connections:
3. Video.
Please see the following video for a short demonstration of the Lamp.
https://youtu.be/E41QS3BE7NI
4. Software sample code.
The software is made by use of the standard Arduino IDE together with special Neopixel libraries.
The Arduino IDE is configured to support the Wemos hardware as described at the Wemos homepage.
The code is described in the attached documentation.
5. User's guide.
The present firmware for the Lamp goes through two stages during power up: Initialisation and operation.
Each of the stages will be described below.
5.1 Initialisation
During power up each of the LEDs will at first turn blue one by one in a circular pattern.
During this process the Lamp will try and connect to the WiFi network which is stored in the non-volatile memory.
Once connected to a WiFi network or after a timeout period (20 sec) each of the LEDs will turn red one by one in the same circular pattern.
During this period it is possible for the user to interrupt the power up process and enter the WiFi configuration mode. This is done via the Arduino IDE serial monitor or similar.
If no user intervention has happended (within 5 sec) then the Lamp will enter operation mode and start to light up accoding to the saved configuration.
5.2 Operation
Once in operation mode it will be possible to interact with the Lamp and change the way the Lamp is operating, either by a browser or by sending HTTP POST requests to the Lamp.
The attached image shows the very simple WEB interface.
Below is a description of it.
At present there are the following possibilities for changing the configuration of the Lamp:
- Static
- RainbowCycle
- Fade
More information can be seen in the attached document.
6. Documentation
The attached PDF-document includes the following sections:
1. Introduction.
- Same as described here
2. Description of involved components.
- A short walk through of the Wemos, Neopixel and the Grönö lamp.
3. Schematic.
- Same as described here.
4. Mechanical assembly.
- A thorough walk through of the mechanical changes needed to the original Grönö lamp from IKEA to fit the new purpose.
5. Software.
- A walk through of all the software components included in the Wemos firmware, together with a walk through of how to submit HTTP POST requests.
6. Operation of the Lamp.
a. How to operate the modified lamp in daily use.
7. Appendix.
a. Listings of all the used software.
This is a small project that investigates what can be accomplished by a Wemos D1 mini pro, a Neopixel Jewel 7, and a (modified) lamp from IKEA.
Some may say that it is a Philips HUE or IKEA Tradfri clone, but this was not the intention when the project was started.
The project reviews the following toppics:
- How to control a NeoPixel 5050 RGB LED with Integrated Driver Chip
- How to connect the Wemos to a WiFi network.
- How to set up a simple webpage to control the Wemos/Neopixel.
- How to submit HTTP POST requests to the Wemos WEB-page.
Each topic can be used in other projects alone or together. It is just a matter of imagination.
As shown later the schematic is exstreamly simple – all the hard work is done in software.
In order to assemble/modify the IKEA lamp, some mechanical skills are needed.
You also need to do some soldering, but it should be possible to handle.
2. Schematic.
The schematic is extremely simple as shown below in the attached image.
Make the following connections:
- Wemos GND <-> Neopixel Jewel 7 GND.
- Wemos 5 Volt <-> Neopixel Jewel 7 PWR.
- Wemos D8 <-> Neopixel Jewel 7 IN
3. Video.
Please see the following video for a short demonstration of the Lamp.
https://youtu.be/E41QS3BE7NI
4. Software sample code.
The software is made by use of the standard Arduino IDE together with special Neopixel libraries.
The Arduino IDE is configured to support the Wemos hardware as described at the Wemos homepage.
The code is described in the attached documentation.
5. User's guide.
The present firmware for the Lamp goes through two stages during power up: Initialisation and operation.
Each of the stages will be described below.
5.1 Initialisation
During power up each of the LEDs will at first turn blue one by one in a circular pattern.
During this process the Lamp will try and connect to the WiFi network which is stored in the non-volatile memory.
Once connected to a WiFi network or after a timeout period (20 sec) each of the LEDs will turn red one by one in the same circular pattern.
During this period it is possible for the user to interrupt the power up process and enter the WiFi configuration mode. This is done via the Arduino IDE serial monitor or similar.
If no user intervention has happended (within 5 sec) then the Lamp will enter operation mode and start to light up accoding to the saved configuration.
5.2 Operation
Once in operation mode it will be possible to interact with the Lamp and change the way the Lamp is operating, either by a browser or by sending HTTP POST requests to the Lamp.
The attached image shows the very simple WEB interface.
Below is a description of it.
At present there are the following possibilities for changing the configuration of the Lamp:
- Turn the Lamp On and Off.
- Set the Brightness of the Lamp.
- Delay changes the delay between each Lamp illumination. The Delay is set in usec.
- At present the Lamp have 4 patterns of illuminations:
- Static
- RainbowCycle
- Fade
- When in Static mode the colour can be changed by changing the Red, Green and Blue colours.
- Save configuration does as it says, if not the present configuration will be lost at the next power off.
- Comment indicates what happened to the Lamp after the last update.
More information can be seen in the attached document.
6. Documentation
The attached PDF-document includes the following sections:
1. Introduction.
- Same as described here
2. Description of involved components.
- A short walk through of the Wemos, Neopixel and the Grönö lamp.
3. Schematic.
- Same as described here.
4. Mechanical assembly.
- A thorough walk through of the mechanical changes needed to the original Grönö lamp from IKEA to fit the new purpose.
5. Software.
- A walk through of all the software components included in the Wemos firmware, together with a walk through of how to submit HTTP POST requests.
6. Operation of the Lamp.
a. How to operate the modified lamp in daily use.
7. Appendix.
a. Listings of all the used software.
Discussion (0 commentaire(s))